Friday, December 18, 2015

2 Simple Homemade Body Scrubs for Gorgeous, Glowing Skin

Source Taken From here

Most of us swear by our daily skin care regime. From moisturisation to toning to cleansing, we do it all. Following basic care routines is great, as it keeps your skin clean and free from blemishes and breakouts.

In most cases, this skin care stays restricted to the face. Most women completely forget to look after the skin on the rest of the body. This leads to dull and lifeless skin and the signs of ageing are soon to follow.
Having beautiful and healthy skin means taking care of your entire body, and not just the face. Using homemade body scrubs is a great way to make sure that your body skin is taken care of.

Benefits of using homemade body scrubs:

  • These are easy to prepare and inexpensive.
  • Also, these scrubs are extremely effective in helping to rejuvenate the skin while making it smooth.
  • In addition to all this, they also help to remove dead cells, leaving the pores clean.
  • Homemade body scrubs can be made using various ingredients. Choose any of the following homemade body scrubs to exfoliate your skin once or twice weekly.

    2 brilliant body scrubs

    1. Coffee body scrub:

    This will scrub away all your dead skin cells, revealing softer and healthier looking skin. It will add moisture to your skin and is especially great for winters, as it will help prepare the skin to meet the harsh weather.

    What you need:

    • ¼th cup ground coffee
    • (Coffee is a great scrub for our skin as it helps fight cellulite.)
      • ¼th cup sugar
      (Sugar works as an exfoliator. It helps to remove the surface layer of dead skin cells. You can also use brown sugar instead of the regular white sugar.)
      • 2 tablespoons of Extra Virgin Olive Oil
      (Olive oil penetrates deep into the skin and protects the skin from ageing. It makes the skin supple and endows it with a youthful glow.)
      • 3 Vitamin E capsules
      (Vitamin E has antioxidant properties that protect and repair the skin cells. It helps make the skin soft and supple.)

      How to prepare:

      • Mix sugar with ground coffee, olive oil and the extracted oil from the slit Vitamin E capsule
      • Turn it to a paste.

      How to use:

      • Use this mixture to scrub your entire body.
      • Scrub away gently for 10 to 15 seconds until you feel your skin has turned soft and silky.
      • Rinse it off with lukewarm water
      • Make sure you use a body wash to experience the softness of your skin.
      • Once done, apply a moisturizer of your choice to retain the moisture.

      2. Lemon and sugar body scrub:

      This is one of the best forms of exfoliation that helps to get rid of rough skin. It helps you get soft and smooth skin.

      What you need:

      • 1 cup of granulated sugar
      • 1 teaspoon of lemon juice
      • 6 tablespoons of Olive Oil or Sweet Almond oil

      How to prepare:

      • Mix all the ingredients well.
      • Your scrub is ready

      How to use:

      • Moisten your skin when you go for a shower
      • Next, massage and scrub all over your body.
      • Rinse it off and pat dry
      • You will immediately feel the difference in your skin!
      • Those who have very dry skin can apply a moisturizer of their choice to help retain the moisture. The olive oil or almond oil in the scrub will also act as a natural moisturizer for the skin.
      These entirely natural body scrubs will help renew your skin’s surface to reveal smoother skin that glows with good health. As these are natural, there is no risk of any reaction or allergies.
      Do try these out at home and tell us which one worked best for you. We look forward to hear about it in the comments below!

Tuesday, November 24, 2015

DIY – Homemade Hair Growth Tonic

Source Taken From Here


“Oh, I lose hair every day and I don’t know what to do about it”. “Someone please tell me what to do for my thin hair”. “My hair just does not seem to grow”.
Don’t you hear such questions being echoed from everywhere around you? Well, I do. And I don’t play the blame game. Yes, the pollution level in the cities today can really wreck havoc with our hair. But the fact is that most of the people complaining about hair related problems do nothing to take care of their locks in the first place! Most lack the basic knowledge of how to pamper their hair. So, I decided to share my secret for long, healthy hair with you today!

Where Did I Hear About This Homemade Hair Tonic?

Around 3 years ago, I had this sudden passion to grow my hair long and was all ears to any advice about hair growth. One of my friends passed me this recipe, and assured me that it worked. She had obtained this magical potion (so to say) from a hair expert in Lakme salon. And it worked like magic for my hair alright!


DIY – Homemade Hair Tonic for Hair Growth:

What Do You Need?

Mustard oil, fenugreek seeds and of course you should know how to work with the stove!

What To Do?

DIY hair tonic 01

  • Take around half a liter mustard oil.
  • DIY hair tonic 02
    • Pour all of it in a pan which is to be heated later.
    DIY hair tonic 03
    • Take some fenugreek seeds. (you needn’t do the heart art like me)
    DIY hair tonic 04
    • Drop half of the shown quantity (in the heart) in the pan containing oil.
    DIY hair tonic 05
    • Ignite the stove and place the pan containing oil on low flame. Do not boil the oil by keeping it on high flame. Wait for the seeds to slowly turn black. That would take just about 10-15 minutes.
    DIY hair tonic 06
    • Now turn off the stove and put the pan aside for 30 minutes or so, allowing the oil to cool down.
    DIY hair tonic 07
    • After the said time, sieve out the oil in a bottle or any preferable storage container. Discard the seeds.
    DIY hair tonic 08
    • You can clearly see the difference in the color of the oil. Mustard oil is generally golden brown in color where it has turned blackish brown with fenugreek essence after heating it with the seeds. Not only this, but the fragrance also changes; you can recognize the fenugreek essence by sniffing the oil.
    There you have it – your own homemade hair growth tonic!

    How to Use:

    Oil your hair with this potion a night before you plan to wash your hair. If not so, massage with it at least 1 hour before head wash but the former idea would give better results in my experience. That is it, no hard work and no multi step procedure to follow every 3 days.
    Trust me, I am the living proof that this tonic works like magic! Not only does it enhance hair growth but also turns the hair brown over a period of usage. If you do happen to like brown hair, use it alternatively with amla hair oil. I have passed on this recipe to many of my friends and most of them have witnessed great results.

    Suggestions for Alternate Changes:

    You can mix this tonic with olive oil in equal or less quantity if you wish to have both length and volume. Personally, this tonic enhances the length and olive oil enhances volume for my hair; that is why I suggest you try this combination too.
    Note: You have to be patient and make it a part of your hair care regime permanently because hair doesn’t grow overnight unless you are Rapunzel’s descendent!
    This easy to make tonic for hair growth is sure to give you the hair of your dreams. Do try it and come back to share your experience with us!
    Until next time take care!

Is Rice Water Beneficial For Your Skin?

Source Taken From here

Did you ever know that the rice water that you usually throw away has a lot of vitamins and minerals? Well, it’s true! It also comes with many benefits as well.


The best part about rice water is you can make it at home in a very simple way! Would you like to know more? Keep reading!

How To Make Rice Water:

Like we promised, rice water is super easy to prepare. Here is a step by step guideline that should help you with the process:
  1. Scoop out a bowl of uncooked rice and wash it with cold water.
  2. You should wash at least thrice.
  3. Make sure the final water is free of dirt.
  4. Keep boiling the rice until it has been cooked.
  5. Once the water has been drained in a pot, pour it in another vessel.
  6. There should be no grains left in the water.
  7. Let the water cool down so that you can store it in a glass jar.
  8. The rice water is now ready for regular usage.
What Does Rice Water Do To Your Skin?
Rice water can give you that perfect porcelain finish you have always dreamt of. It lightens and brightens your skin instantly and helps you achieve smooth, soft and a flawless skin tone. Rice water is better than the expensive skin whitening serums because it is natural and doesn’t cost you a dime. It removes sun spots, skin spots, wrinkles and lines of aging. Rice water also contains antioxidants that heal acne and reduce breakouts. It removes impurities from your skin, reduces your pore size and lets your skin breathe!

How To Wash Your Face With Rice Water:

Pour some rice water in a bowl. Take a piece of cotton and dip it into the water. Apply all over the face in circular motions. Be gentle. Once you have done that, wait for a couple of minutes. Wash off with cold water again. Your skin will look refreshed!

Facial Mask Using Rice Water:

A rice facial mask will hydrate your skin, moisturize and exfoliate it. It is a must for all those who love home-made face packs.
  1. Take half a cup of rice and place it in a bowl. Add two cups of water. Stir using a spoon.
  2. Now let the rice sit for the next half an hour. Pour the rice water through a sieve so that both the water and rice can be separated.
  3. Grab a pair of scissors and cut holes in a piece of paper that would fall onto your eyes, nose and the mouth.
  4. Now remove the paper towel and place it on your face gently.

Make Rice Flour Facial Using Rice Water:

Ingredients:
  • 2 bowls
  • One spoon
  • Sieve
  • Scissors
  • Paper towel
  • Small potato
  • Knife
  • Cheese grater
  • Rice flour
  • Rice water.
Steps:
  1. Use a knife to peel a potato.
  2. Grate the potato using a cheese grater.
  3. Now pick up some of the grated potatoes and squeeze the juice into a bowl.
  4. Add some rice flour to the potato juice. Stir till it becomes a paste.
  5. Add three tablespoons of rice water. Mix.
  6. Apply all over the face using your finger tips. Leave it on for 20 minutes.
  7. Wash off with cold water.

Rice Water Uses:

1. Skin Toner:

Rice water makes the best skin toner of all. It tightens your skin leaving it firm, smooth and radiant. Dab a cotton ball in a bowl of rice water and massage your face using it. The results will show in a week.

2. Heals Acne:

Breakouts can now be taken care of with rice water. Apply all over the acne area with a cotton ball. The redness effect will reduce.

3. Lightens Your Skin:

Rice water is much more beneficial than artificial beauty products. It will help you achieve a fairer and brighter complexion over time. Rice water contains no chemicals, which means your face will be nourished entirely. Massage rice water using finger tips and air dry after a few minutes.

4. Beautiful Body:

According to a dermatological study conducted at Brussels University, patients who were afflicted with dermatitis saw significant improvement after bathing for 15 minutes in rice water twice a day. So, if you have an ugly rash, use rice water as your ultimate remedy.

Is Rice Water Beneficial For Hair? 

Yes, it is! Rice water is great for your hair. Recommended by doctors and experts, this healthy liquid promises to make your hair long, strong and shiny. Would you like to know how? Keep reading!

1. Hair Conditioner:

You can use rice water as a conditioner after shampoo. Apply all over the hair strands. Give it a few minutes and wash off with cold water. Do this thrice a week.

2. Reduces Split Ends:

Rice water can also fight split ends naturally. Simply dip the ends of your hair in a bowl full of soaked water. Stay still. Wash your hair with running water after 15 minutes.

3. Adds Shine:

Chop one banana into slices. Mash them together. Apply all over the hair using rice water and rose water. Place a plastic cap on the head. Wash off after 20 minutes.

Health Benefits Of Rice Water:

Here are a few health benefits of rice water you must know:

1. Slows Down Aging Process:

Rice water is full of Vitamin B1 that is healthy for your hair and skin. It slows down the aging process and enhances your beauty over time (1).

2. Protects You From Macular Degeneration:

Rice water contains 8 amino acids that protect you from macular denegation. Failure to obtain amino acids can lead to degradation of body proteins (2).

3. Boosts Immunity And Metabolism:

Rice water contains vitamins and minerals that boost immunity and increase aerobic metabolism. It also makes you a stronger and fitter person by increasing bone density.
Did you enjoy reading this post? Have you tried rice water before? Let us know your ideas by commenting in the box below.

How To Use Flax Seeds For Hair Growth?

Source Taken From here

Have you heard about the benefits of flax seeds in promoting hair growth? Flax seeds are often one of those less discussed ingredients that are beneficial for hair health. But they are surely one of the most natural and effective cure for restoring lost volume and shine to your hair. Flax seeds are also known as linseeds, which contain a nut like flavour and appearance. These are an ideal solution for several hair problems as they are easy to find and less expensive compared to other alternatives.

Why are flax seeds beneficial for hair?

  • Flax seeds are a rich source of vitamin E. Vitamin E has proven effects on growth of the capillaries.
  • It provides nourishment to the hair roots, shaft, and the scalp.
  • Flax seeds fulfil the required nutrition for hair and scalp in order to expedite hair growth.
  • They also help control hair breakage or split ends, and provide the required hydration for hair.
  • Vitamin E in the flax seeds helps prevent premature discoloration or graying of hair.
  • Flax seeds contain high amount of Omega-3 fatty acid. These help nourish hair follicles. This in turn helps make hair strong and healthy. Omega-3 fatty acid also improves the elasticity of hair and makes it less prone to breakage.
  • Regular use of flax seeds helps prevent acute hair loss, scalp eczema, and dandruff.
  • Flax seeds are a good source of high quality fibre.
  • These are an affluent source of both soluble and insoluble fibres. Edible fibres are excellent for proper functioning of the intestines. This helps create defence against a host of ailments, which might cause hair loss.

How to use flax seeds for hair growth:


Flax seeds can be used in different ways for treating various hair conditions.
  • Inclusion of flax seeds into regular food chart increases the nutrition value of the foods to a large extent.
  • To make it a part of your diet, grind the seeds to make a fine powder.
  • This powder can be added while preparing cookies or muffins.
  • On the other hand, ground flax seeds are good to add into smoothies and shakes.
  • A hint of flax seeds on stir-fried vegetables enhances the flavor of the dish.
  • Edible flax seed oil is also popularly used as a dressing while making salads.
  • Cottage cheese and yogurt gain flavour when mixed with flax seed powder.
  • Flax seeds can be used for making shakes of different flavours like raspberries, banana, honey, milk, and wheat germ.

Ground flax seed for hair growth

Ground flax seeds are popular for their crunchy and nutty flavour. One should be careful while storing ground flax seed, as it can spoil when kept in the open. Therefore, it is always safe to keep the mixture in an airtight container, and away from the sun. Ground flax seeds can be stored for three months at a stretch.

Flax seed hair gel for hair growth

Hair gels made of flax seeds are a popular cure for hair loss. For best results, apply the gel directly on the scalp.
It is quite easy to make flax seeds gel at home.
  • Take two cups filtered water, and 1/4th cup organic, brown flax seeds.
  • The seeds are to be added to boiled water, and the extract is to be filtered for use.
  • The remaining flax seeds can be dried up and stored away for further use.
While some households do have flaxseeds in their kitchen, its benefit for hair growth is mostly unknown. We hope the above tips will be of use. Do let us know.

Recommended Articles:

DIY: Hair Conditioner

Source Taken From here

We girls are so much in love with our hair that we don’t even think before spending thousands of bucks for a hair treatment. All that we want from our hair is, its gonna shine and be smooth and tangle-free. What’s the big deal in that ladies? conditioner is what we want for that. Moisture is all that will give mirror-shine to our hair. Do you really need to go to a parlour for that? What if we tell you that, you can do all that at home without spending an extra buck and you’ll get better results. Tempted to know what they are?
Here we give you those very simple and inexpensive at-home conditioner recipes :
homemade hair conditioner with egg
  • Combine 1 tsp baby oil, 1 egg yolk and 1 cup water – Beat the egg yolk until its frothy, add the oil then beat again. Add to the water. Massage into the scalp and throughout your hair. Rinse well.
    • Take one teaspoon of wheat germ oil, One cup of water, One teaspoon of lemon juice, Egg yolk of one egg, One tablespoon glycerine, One tablespoon milk. Beat the egg and mix all other ingredients. Massage on the head. Rinse off with lukewarm water which is mixed with lemon juice.
    • Combine the ¼ cup olive oil, ¼ cup vegetable oil, ½ cup water, 2 tbsp honey and boil on stove. Immediately remove from heat and allow to cool. Transfer into a spray bottle. Spray on wet hair and wrap hair in towel for 15 minutes. Remove towel and rinse. Store conditioner in a cool place between uses.
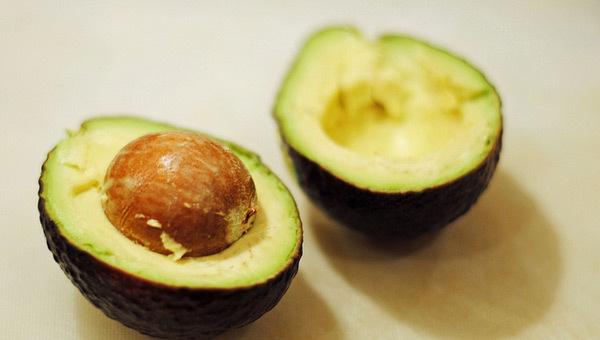
    • hair conditioner using avocado
        • Mix mashed avocado with coconut milk until its smooth and about as thick as shampoo. Apply through the whole length of your hair. Leave it for 15 minutes and rinse well.
        • Mix 1 large mashed banana with 1 tbsp of honey. Wet hair with lukewarm water. Apply the banana honey mix all over the hair. Put the shower cap on and cover with towel. Leave on for an hour. Rinse out.
        • Lavender-treated conditioner for dry hair: 1 egg yolk or ½ cup of aloe gel, ½ cup coconut milk, 1 cup papaya pulp, 2 drops lavender oil, ½ cup whole milk. Whip all ingredients in a blender till the mixture is thick. After shampooing and rinsing, part your hair into small sections andapply conditioner from hair roots to the ends. Your dry hair will get moisturised and shine.
        • Have you ever imagined onions and cabbage can do good for your hair? Here we have an exclusive recipe for you. Grate few onions and some cabbage together and leave in a copper utensil overnight. In the morning, add few drops of eau-de cologne to remove the onion smell. Add few drops of herbal oil like Indian gooseberry and then apply. Shampoo after 20 minutes. Your hair will gain a superb gloss and colour. You may follow this routine once a week.
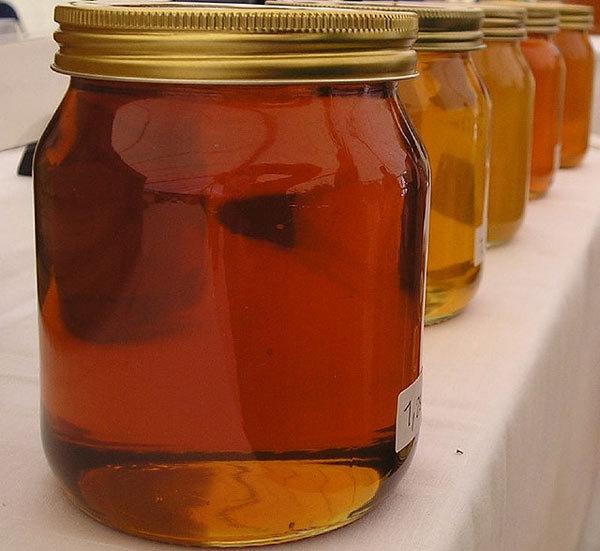
        • Honey hair conditioner
            • Clean and condition your hair as usual. Combine ¼ teaspoon of honey with 4 cups of warm water. Rinse this solution through your hair and style as usual. Great to use before a big date.
          Hope these ingredients are easily available in your kitchen. Do try out these recipes and let us know the results.

Thursday, November 12, 2015

Ayurveda’s Turmeric Milk, Skin Salve And Face Wash.

Source Taken From here

Ayurveda's Turmeric Milk, Skin Salve And Face Wash.
Ayurveda’s Turmeric Milk, Skin Salve And Face Wash.

Turmeric: The Multipurpose Super Herb

The curative properties of turmeric have lent it to be used as a spice in Indian recipes and medicine in Ayurveda for thousands of years. The healthy nutrients of milk team up perfectly with the anti-inflammatory qualities of turmeric. Turmeric milk or Haldi ka doodh (haldi means turmeric, doodh means milk) brings this sweet nectar onto the favorite’s list of healing rasāyanas of many traditional yogis and Ayurvedic Consultants.

The 6 Tastes:

In Ayurvedic cooking we want to make sure we deliver all six tastes (sweet, sour, salty, bitter, astringent, and pungent) in every meal.  This balances the doshas which leads to less imbalance and sickness. What I find is that I can eat about 1/3 as much food and feel a sense of satiation when all the tastes are included in my meal. That is such a good thing in this day and age of the giant plate meals. But it also explains why those giant plate meals even exist. In a meal that isn’t well planned to offer all 6 tastes, we continue to eat hoping that we will eventually, if we eat enough, find enough of these tastes and then be satisfied. Sometimes we do, sometimes we don’t, but either way, we are eating far too many calories.
It is sometimes difficult to get all the tastes into one meal. One of the easiest ways to meet this requirement is to use spices. For instance turmeric supplies the bitter, pungent, and astringent tastes with just one spice. These are sometimes the three harder tastes to add to a meal.  It is a heating spice thought to help in diabetes and also promotes good digestion. Turmeric increases vata and pitta if too much is consumed, and relieves kapha.
Ways to consume Turmeric:
There are many ways you can take turmeric: fresh, dried and grated as a spice, capsule, or pills. If you read my previous blog about turmeric, you know that turmeric is anti-inflammatory, antibacterial and antiseptic properties offer many benefits.  It can relieve pain and swelling (known in Ayurveda as nature’s aspirin) and can even be applied to small cuts and wounds, helping with blood clotting, preventing infection and healing skin.
Milk is a great delivery system for turmeric whether you are using it internally or externally. Adding turmeric to milk increases milks own antioxidant qualities. Milk fights free radicals that damage skin, making it lose its elasticity and glow. Milk also strengthens bones, which helps with osteoporosis and arthritis (joint inflammation and pain). Consuming the drink twice a day before meals will ease morning stiffness, reduce pain and swelling in the joint. But it’s the anti-inflammatory qualities that make turmeric milk a favorite for soothing sore throats and calming coughs. Raw organic honey is often added not only for taste but for its own powerful anti-oxidant, anti-viral and anti-fungal properties.  Raw honey is known in the Ayurveda world as being a prabhava, a term which means the unexplainable special effect of a substance, that cannot be explained by rasa (taste), virya (the quality of energy released by an herb or food after eating), or vipāka (the final post-digestive effect of food that occurs in the colon and has an action on the excreta.) Being the scientist that I am, this was not a hard concept for me to understand, just a hard one to explain on paper, so thank you Brian Brink, one of my Ayurvedic teachers from Kripalu for that definition.

Here are some recipes for you to try:

Basic Turmeric Milk Recipe

Ingredients:
½” of fresh ginger grated
½ tsp. dried turmeric powder or 1 inch piece fresh turmeric
1 cup whole milk
½ cup filtered water
1 Tbls raw honey, or to taste
Method:
Place all ingredients except honey into a pan and simmer for 20 minutes. Let stand for 15 minutes to seep. Rewarm if needed and then add the honey. Once the honey has been stirred in, strain and sip. (www.livebrightandhealthy.com)

Sore Throat Soothing Turmeric Milk Recipe

Ingredients:
½ tsp. dried turmeric powder
1 tsp ginger minced
¼ cup water
Method:
Top off the cup with milk and heat the mixture for a few minutes until the milk almost boils. If you want to add peppercorns, which is thought to improve the absorption of the turmeric you can also add that to the mixture before heating. Other flavors can be achieved by adding a few pods of cardamom (cracked) and a pinch of saffron to the milk/water concoction before boiling.

Cough Turmeric Milk Recipe

Ingredients:
1 cup milk
Sugar to taste
½ tsp. ajwain (carom seeds)
¼ tsp. turmeric powder
Method:
Add milk and sugar to pan and heat until sugar dissolves. Set aside. Take ajwain and roast in a non-stick pan for a few minutes until brown. Add to the ajwain mixture the turmeric and stir. Add to the warmed milk, mix well, strain, and sip while warm. (www.turmericforhealth.com)

The Ultimate Turmeric Milk Recipe

Ingredients:
2 cups fresh whole milk
½-1 tsp of turmeric powder
2-3 whole peppercorns
2-3 cardamom pods cracked
½ inch ginger, roughly chopped
½ tsp ghee (not if you are experiencing mucus)
Pinch of saffron, optional
Honey or jaggery for taste
Method:
Heat the milk along with the spices for 2-3 minutes or until the milk is almost boiling. Add sweetener to taste, let cool until warm and strain and serve. (www.journeykitchen.com)

Sleepy-time Turmeric

Use the basic turmeric milk recipe and add nutmeg. Nutmeg helps you sleep.

Turmeric Honey

Ingredients:
9 Tsp dried turmeric powder
½ Tsp freshly ground black pepper (grind it finely)
½ Tsp dried ginger powder
Raw organic honey
Method:
Mix turmeric, pepper and ginger thoroughly.  Start adding a liquid honey into the powder.  It helps to warm the honey (not cook, just warm) which allows it to absorb better.  Whipped versions of honey or old honey that has begun to crystallize will not work, the honey needs to be runny.  Stir, slowly adding the honey until all the powder is dissolved and you have a thick paste.  The amount will vary depending on the moisture content of the honey.  Store turmeric honey in an airtight jar.

Turmeric Milk (Non Dairy)

Ingredients:
8 ounces almond or coconut milk
1/2 teaspoon turmeric
1/2-inch wide round slice of ginger root, peeled and finely chopped
Dash of cayenne pepper
1/2 – 1 teaspoon honey (or molasses as suggested by my dear friend and yoga teacher Shari)
Optional additions: a tsp ghee, cinnamon, cardamom
Method:
Gently warm the almond or coconut milk on the stove. In a mug, combine the remaining ingredients. Drizzle a teaspoon of the warmed milk into the mug and mix until the liquid is smooth with no lumps. Add the rest of the milk and mix well. You can leave the pieces of ginger in the tea, or strain it out before drinking. (www.marksdailyapple.com)

External Use of Turmeric

Turmeric Paste
Turmeric Paste

Turmeric Paste for Psoriasis

Turmeric is now gaining attention in the Western scientific community for the treatment of various conditions, including psoriasis. According to the journal Advances in Experimental Medicine and Biology,curcumin is the active ingredient in turmeric responsible for inhibiting skin growth factors that lead to psoriasis scales.  It has also been used in face wash and face mask concoctions for years to help with acne.
Turmeric Paste Recipe
Ingredients:
¼ cup of turmeric powder
2 ½ cups of water.
Method:
To make turmeric paste, stir and bring to a boil. Simmer over medium–high heat and stir constantly until it reaches a thick honey-like paste consistency. If it gets too dry while cooking add some water. Once cool, transfer the contents into an airtight glass container or jar. It can be stored in the refrigerator up to about a month.
To use, spread a thin layer of turmeric paste onto the psoriasis-affected areas of skin, before bedtime. Use enough paste so that you cannot see the underlying skin, but not so much that the paste is falling off. Wrap a piece of gauze around the skin treated with turmeric paste to keep the paste in place. Leave the turmeric paste on your skin, covered with the gauze, overnight. Remove the gauze and wash the turmeric paste off of your skin using warm water.
Turmeric permanently stains porous surfaces, such as plastic and clothing. It temporarily stains the skin, giving it a light yellow to orange color. Stains on the skin gradually fade over a few days’ time.

Turmeric Face Wash and Mask

India’s brides have been using this recipe for years to give them beautiful radiant skin on their wedding day. But you don’t have to be walking down the aisle to gain the benefits from this face mask. It not only will brighten the skin, but will also help with acne and age spots.
Turmeric Face Wash Recipe
Ingredients:
¼ teaspoon of turmeric powder
¼ teaspoon of neem
A few drops of coconut oil
Method:
To make this recipe, place the turmeric and neem in a small bowl and mix well. Then place a small amount in the palm of your hand and add coconut oil, drop by drop until you reach the desired consistency. Apply the turmeric paste onto your face and neck beginning at the forehead and moving down, making sure to avoid the eye area. For face wash, gently massage over face for about 30 seconds.  It is a little gritty so be gentle.  Rinse face with cool water.  To use as a mask, let the paste dry, it takes about 20 minutes. Wash off the mask with warm water and then after all paste has been removed, splash your face with cold water. Gently dry with a soft, clean towel.

I am sure this is not the last word on turmeric. But for now, hopefully this information will give you a way to invite turmeric into your lives. My mission always is that you live healthy and happy every day, and if anything that you have learned from me helps you do that, then well I have done my job.
Please feel free to share my blogs with your friends and family and thanks for reading.